Bose SoundInsertVerbHere
tl;dr
AfterTouch restores the 6 preset buttons (along with other functionality) on Bose SoundTouch products that relied on previously-operational Bose servers.
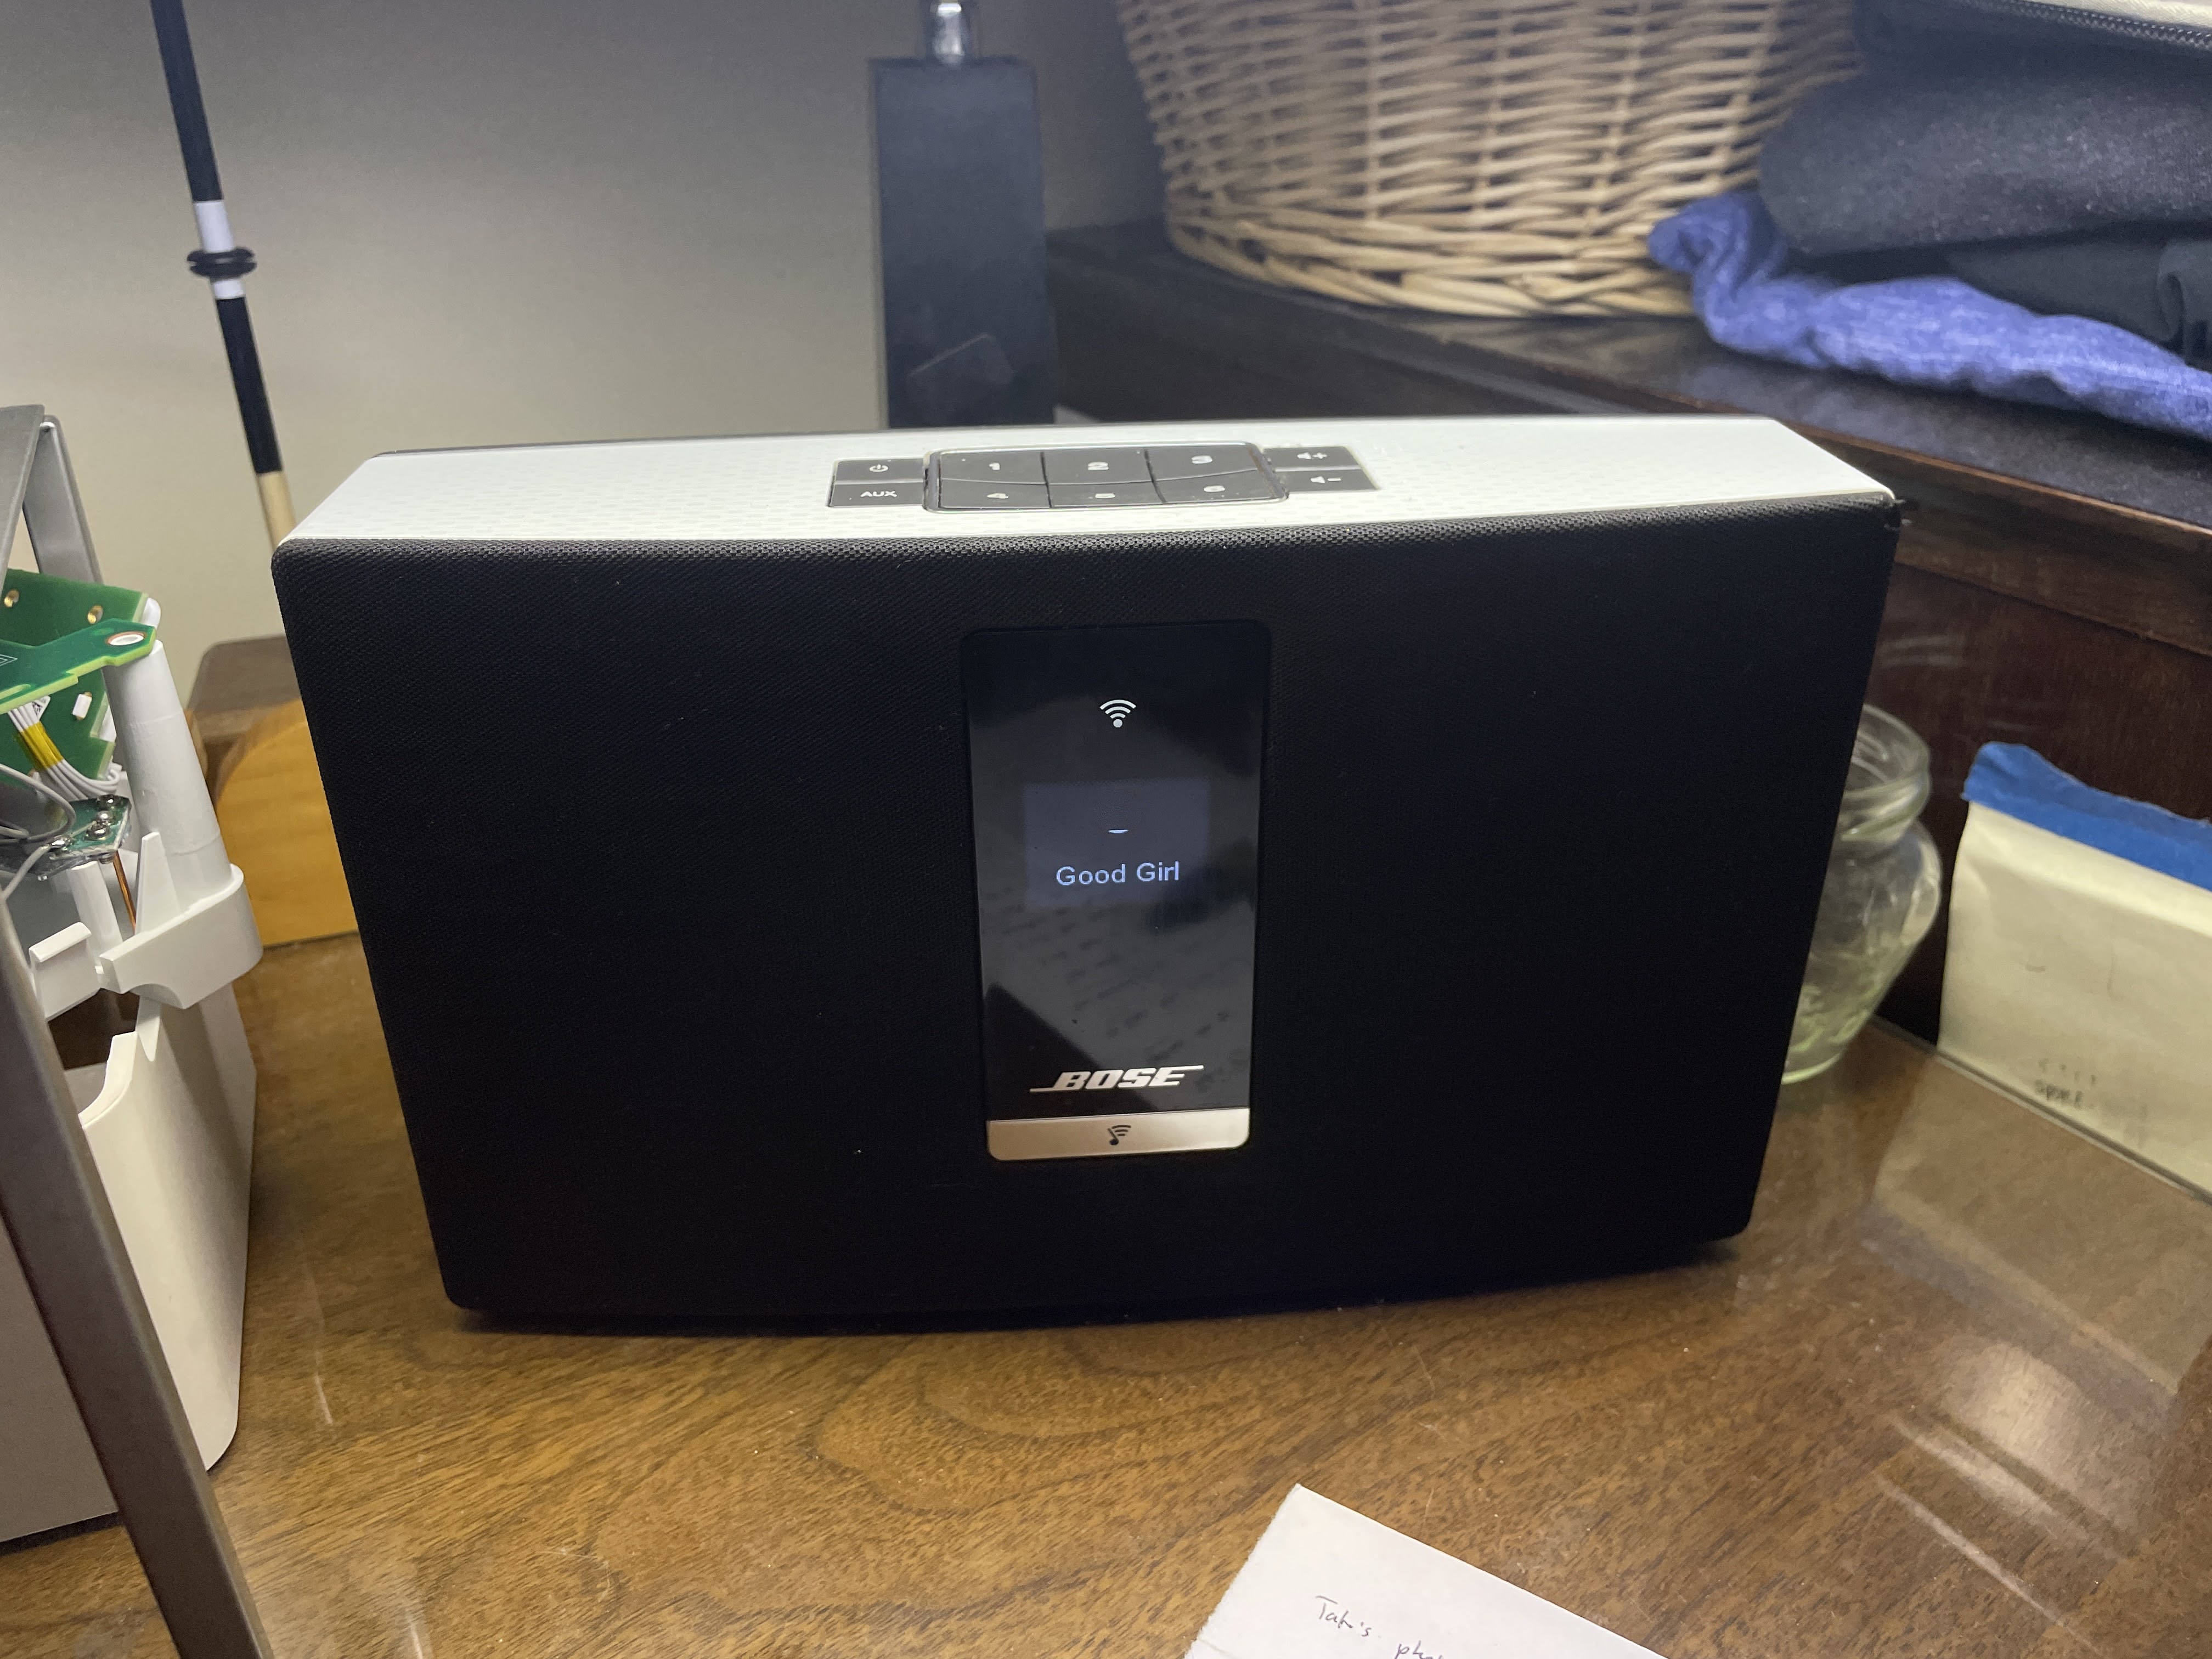
I pulled a Bose SoundTouch Portable (2013) from our dump’s electronic waste. It didn’t come with a charger, or a remote, but luckily, the charger from my Bose SoundDock Portable (2007) had the same voltage, and it fit just fine.
I knew this was a wifi-enabled speaker, because it had this black panel on the front with a ‘SoundTouch’ logo, which is a wifi icon with a music note pushed to the side. Thus, with experience from setting up the Bose SoundLink Air, I knew I had to get it into setup mode to tell it my wifi password.
On that speaker, there was a convenient reset button underneath the unit, but here, no such button exists.
This reddit post was helpful; You just need to hold down the ‘2’ preset button and the volume down button together for a second or two to get it into its WiFi setup mode.
The speaker turns itself into a wifi router, letting you connect to it. Once you’re in, visiting 192.168.1.1 shows you this very quaint wifi setup website. My iPhone doesn’t like staying connected to WiFi that doesn’t provide internet, so make sure that your phone hasn’t quietly switched back to your regular WiFi or mobile data before you’ve entered the setup website.
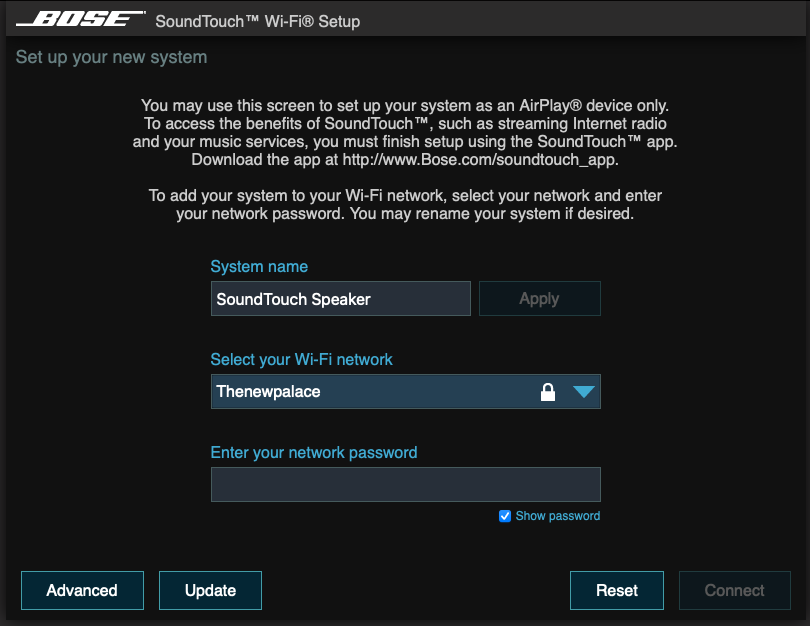
It says it’ll only do AirPlay when you set it up this way, but Spotify Connect worked fine once entered. This is likely a holdover from the SoundLink Air, released just one year prior to this (with this exact same setup screen), which could only do AirPlay, and also because Spotify Connect was not available when the speaker was launched, and this screen was likely not updated to reflect the later addition of Spotify Connect.
I like the color scheme of the setup page, and even though you’ll likely only use this screen once, is quite nice to use, and has little animations to open dropdowns and switch screens.
So, it’s connected, and it already does Spotify and AirPlay. Frankly speaking, it’s more than enough to enjoy this speaker.
However, this speaker is capable of more, and it’s got 6 buttons that let it quickly play presets like a radio station or a playlist.
Unfortunately, the ecosystem that supported these 6 preset buttons has crumbled. It’s only been 12 years!! For some perspective, I probably wouldn’t bother trying to use a 12 year old phone or laptop, and likely wouldn’t push anyone else to do so either. However, speakers often age much better, and are usually worth the trouble.
For this speaker, it’s goal is to see if it can be a reasonable replacement for the Logitech Squeezebox in the Kitchen.
The Bose has the potential to be a great drop-in replacement, and even a small upgrade, because it has a battery in it, so it can be taken outside to listen to in the backyard! I’d have to buy a battery to put in the Logitech. However, I didn’t get remotes for either of the speakers, so they’re on somewhat even footing in that aspect.
Unfortunately, the Logitech’s preset buttons work, and pull up RTE Radio 1, but the Bose’s preset buttons don’t work, so they won’t be able to pull up RTE Radio 1 for my mom. This is basically the only thing the Squeezebox does, and the Bose being currently unable to do the same is a dealbreaker. But, with some effort, the buttons can be brought back!
I got a little sidetracked from the goal of getting the buttons to work, because since I know it’s an internet connected thing, I was wondering if there were tools that would let me screw with it from my laptop. It turns out there have, and some of these git repos have been around since 2014!
Anyways, yes, there is a Python library to muck about and do things like play and pause and adjust volume and all sorts of fun. However, this library, and the others like it (that just play with the local APIs) doesn’t really fix the now-defunct 6 preset buttons, as those rely on a Bose server to do much of anything.
Even though Bose shut down their online services, they actually did something that was pretty neat, which was to share a bunch of information on how the speakers talk to the internet, to help others with the spare time and technical know-how to continue to use these speakers. It’s an act of good will that reflects very well on the company, and is something I hope to see from other companies that release (and later discontinue and stop supporting) their own internet-connected devices.
So, what does fix the preset buttons?
It turns out that I’ve come across this speaker at a wonderful time.
Even though people have been messing with these speakers since 2014, in just the past few weeks, there’s been a considerable amount of activity on how to make setting up one of these speakers to no longer rely on the Bose servers easier and eaiser. As of writing, there’s a Gist that was updated just 11 hours ago!
This was the ’entry point’ I found that linked to everything interesting. It includes the preset button web app tool and a lot of other noise, but it finally led me to AfterTouch.
However, it’s not as easy to get your Bose speaker pointed at a non-Bose server as it is with the Logitech Squeezebox. On the Squeezebox, you just enter in the IP address and you’re ready to go, but for the Bose, you need root access to edit some xml files to configure it to point to your local server
Root access? Yes. The speaker runs Linux. Everything’s computer.
Because the speaker itself is a computer, it makes something pretty incredible possible: instead of running the Bose server replacement on another computer in the house, you can run it on the speaker!
I got distracted again, you can just see what’s playing on the speaker by going to http://<speaker_ip>:8090/nowPlaying, which is pretty neat - this makes it dead simple to take any device and have it check this endpoint every 10 seconds and display what’s playing. Another future project opportunity.
While looking at all the stuff about AfterTouch, I see this stuff about getting root SSH access and a bunch of other nonsense, and I’m a tiny bit afraid I’ll forget something or accidentally brick the thing - and so something like SoundPloy looks nice, and requires no root access.
But, I found my USB OTG cable from a long time ago, and I’d actually like to see what root access is like.
(While looking at the documentation for AfterTouch, I found out why I couldn’t replicate all the stuff the guys from 2014 found out with telneting to port 17000 - the ‘remote_services on’ command was removed in the last update the speaker got.
Setting up AfterTouch
Enable ssh root with a USB drive
For this speaker, you use a connected USB drive to enable root SSH access.
But, the USB needs to be formatted in fat32, and more than this, it needs to be ‘bootable’. Thus, on macOS, I recommend using the terminal disk utility to format it.
First, find your connected USB drive with
diskutil list
Note the disk number that it’s under, and then run
diskutil partitionDisk /dev/disk5 MBR fat32 "MYDRIVE" 100%
Looking at the ‘info’ for a drive after performing either method, both report the bootable flag as ‘No’, but the speaker did enable root login when I did it with the command line utility.
On macOS, it likes to index every file. This is annoying, because it leaves files on the USB drive that can mess up this process. You disable this spotlight indexing with this command:
sudo mdutil -i off /Volumes/MYDRIVE
Lastly, add a file named ‘remote_services’ to the USB.
First, use a terminal to cd to the USB drive with
cd /Volumes/MYDRIVE
and then add the (emmpty) remote services file with
touch remote_services
And you plug it into the back of the device. I had a male micro-usb to female usb-a cable, or an old OTG cable, lying around.
Now, telnet (or, use nc, as Telnet didn’t work for me) to port 17000 and run
sys reboot
(You should get Rebooting system and you’ll see the progress bar appear on the OLED in 10 seconds or so. The WiFi light stayed on during the entire process. I pressed the power button a few times before the progress bar showed up. I’m not sure if that was necessary.)
I’ll note that I kept the speaker plugged in during the entirety of this process. Even if I unplugged the speaker, it likely would have been hours until it accidentally shut off. During no part of this process did the speaker’s power need to be forcibly cut off.
Connecting to SSH
And now that it’s rebooted, I just ran this ssh command to connect:
ssh -o HostKeyAlgorithms=+ssh-rsa -o PubkeyAcceptedAlgorithms=+ssh-rsa root@192.168.1.187
The authenticity of host '192.168.1.187 (192.168.1.187)' can't be established.
RSA key fingerprint is SHA256:xxxxxxxxxxxxxxxxxxxxxxxxxxxxxxxxxxxxxxxxxxx.
This key is not known by any other names.
Are you sure you want to continue connecting (yes/no/[fingerprint])? yes
Warning: Permanently added '192.168.1.187' (RSA) to the list of known hosts.
eth0      Link encap:Ethernet  HWaddr xxxxxxxxxxxxxxxxx
          inet addr:192.168.1.187  Bcast:0.0.0.0  Mask:255.255.255.0
lo        Link encap:Local Loopback
          inet addr:127.0.0.1  Mask:255.0.0.0
usb0      Link encap:Ethernet  HWaddr xxxxxxxxxxxxxxxxx
          inet addr:203.0.113.1  Bcast:0.0.0.0  Mask:255.255.255.252

Sat May 23 23:11:34 EDT 2026

Device name: "SoundTouch Speaker"
Country US, Region (not set)
Module type: scm
root@taigan:~#
And that’s root!
Making root SSH persistent
(optional)
For convenience’s sake, leaving root open is neat, but from a security point of view, leaving a device on your network with no-password root is foolish.
This website says that to make root ‘persistent’ (surviving being unplugged or rebooted): https://wiki.fhem.de/wiki/BOSE_SoundTouch_de-clouding
You run touch /mnt/nv/remote_services
Running sys reboot from that port 17000 TAP interface confirmed that root SSH is persistent! Neat! A security vulnerability!
Then, I checked if the speaker would have enough storage space with df -h to keep the AfterTouch executible in long-term memory.
Devices like these save money by not packaging too much storage space, and even if there’s 100mb free somewhere, it’s often used as a temporary space to cache upcoming songs, and it could be cleared at any time, making it a bad place for stuff that you’d like to keep around.
$ df -h
Filesystem                Size      Used Available Use% Mounted on
ubi0:rootfs              81.4M     72.3M      9.2M  89% /
devtmpfs                 47.7M         0     47.7M   0% /dev
tmpfs                    59.8M    180.0K     59.6M   0% /run
tmpfs                    16.0M    272.0K     15.7M   2% /var/volatile
tmpfs                    59.8M         0     59.8M   0% /media
ubi1:persistent_volume
                         26.1M     76.0K     24.7M   0% /mnt/nv
ubi2:update_volume        7.6M      1.3M      5.9M  18% /mnt/update
tmpfs                    16.0M    272.0K     15.7M   2% /var/lib
tmpfs                    59.8M      4.0K     59.8M   0% /dev/shm
While seeing roughly 25mb (on the /mnt/nv drive) free seems ridiculously small when we all have 128gb phones, the AfterTouch binary is only 12mb, so that’s plenty!
(AfterTouch wants to install itself on /mnt/nv)
Installation
Now, you run the one-liner script to install AfterTouch.
It worked!
Well, the setup wasn’t done yet, and I needed to do some post-install care; The AfterTouch web service wasn’t immediately accessible from <speaker_ip>:8000.
I first needed to ssh in to the speaker, start the AfterTouch service, and forward the port with this command:
ssh -oHostKeyAlgorithms=+ssh-rsa -L 8000:localhost:8000 root@192.168.1.187
Upon some reflection, it’s possible that the service was always running, but running the ssh port forwarding with too many arguments may have made it not work properly. I was running
ssh -o HostKeyAlgorithms=+ssh-rsa -o PubkeyAcceptedAlgorithms=+ssh-rsa -L 8000:localhost:800 root@192.168.1.187, but I’d just get a whole load of this when trying to load localhost:8000:channel 4: open failed: connect failed: Connection refused. Run the proper command, and replace the IP address with the address of your speaker.
And, then you can go through the “AfterTouch” web setup by navigating to localhost:8000 on the same computer that ran that ssh port-forwarding command.
The only hitch I ran into while setting the whole thing up was that I had to do two non-obvious things:
- Enable DNS discovery in the first ‘Settings’ page
- Under the fourth ‘Migration’ page, It wouldn’t let me continue setting the aftertouch server page to ‘127.0.0.1’ or ’localhost’, but localhost.localdomain worked fine, and allowed the ‘migration’ to be done.
More about bullet point 2:
It wouldn’t let me continue with the setup because I was using localhost/127.0.0.1 as the url, and was whining that this was a loopback address. I was aware of this, as I want to run the service on the same device, so it’s either 127.0.0.1 or the IP my router gave it. I don’t want to rely on this speaker having a static IP (it may change, I’m too lazy to go through the Verizon router settings to assign it a static IP), so I don’t want to set it to the current IP. Looking through this issue log, I found that one of the recommended commands was to run nslookup. The output of running nslookup localhost was
root@taigan:~# nslookup localhost
Server:    192.168.1.1
Address 1: 192.168.1.1 CR1000A.mynetworksettings.com

Name:      localhost
Address 1: 127.0.0.1 localhost.localdomain
(The first thing is the Verizon router) So, I tried localhost.localdomain, the errors went away, and I was able to proceed.
Finally, I rebooted the thing by clicking a button in the web interface, and the presets I set up earlier with that website worked!!
Note: I believe the presets only moved over because I ‘synced’ them in the third tab named ‘Data Sync’. Even if they didn’t sync, it really didn’t matter, because I didn’t really have anything to migrate.
p.s. Why is the title ‘BoseSoundVerbHere?’
It’s because Bose had a lot of product lines beginning with ‘Sound’, eg. SoundDock, SoundTouch, SoundLink, and so many Sound+Verb combinations.